Monday, August 26, 2013

Weekly Layouts

Wahoo!  I finally got some cropping time this past Saturday with a dear friend.  We spent 10 hours together at our LSS.  I finished 13 layouts.  Well almost.  Several of them need a tweak or two.  I thought I'd share some of them here over the next few weeks.

Since my cropping time is suddenly non-existent (hello, new grandson), it is more important than ever than I use the time wisely.  I chose to use sketches on all but two of the layouts, and on that one I used a 12 x 12 die cut overlay, that I'll share later.

I think it's important to use WHATEVER tools you have available to get the job done.  I really do love sketches.  I love recipes, but I also love that I can venture off and add/subtract or switch it up if I need.

(Whenever I share photos on ye 'ole blog, just click on them to see them bigger.)

First up is a layout from the Well Heeled breast cancer luncheon I attended last year.  What a hoot that turned out to be!  I actually walked the catwalk, modeled my shoes, and won...er, the shoes did.  They shoes stole the show, actually.
I added the program to the area where the sketch called for journaling.  Easy.  I also included my name tag with some cute washi tape.  The big journal box was computer generated and cut with a Spellbinders Label One die.
 
Glitter paper just doesn't photograph well, but it really sparkles.  The title and the pink ribbon accents were cut with my Silhouette Cameo.  Yep, cut through the glitter paper just like butter!  Of course, I needed to add the rhinestones to the shoe!  And, I added one of the accents directly to the top of a photo!
Here's the Let's Scrap inspiration.
4-10-13 Sketch
The second layout is April's Baby shower and it will go into Gavin's Project Life book.  I only used the left side of the sketch.  Instead of just one large photo, I grouped six photos together in PSE using a template and printed them as one large photo.
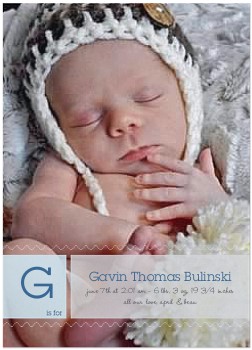
I just have to give you a close up shot of my title!  It was a baby t-shirt shape from the Silhouette store.  I added the Baby Shower text to the top.  I embellished the finished shirt with the blue footprint washi tape and a gingham bow.
 
It was based on this Let's Scrap sketch:
7-31-13 Sketch
And, finally, Baby Love.  These are the pictures from the "gender reveal" photoshoot I had with the kids just after we found out that we were indeed having a boy.
Again, the embellishments were cut on my Silhouette Cameo.  I added the blue sparkly accents with a Gelly Roll pen.  And, yes, all of the picture props and ideas were mine.  I tweaked some of the photos to black and white, and left only the props blue for emphasis.
Based on this Let's Scrap sketch:  I loved this sketch.  So super simple and such clean, straight lines.  I like those!
8-14-13 Sketch
Well, there you have it...five finished pages.  Done & documented.

Friday, August 23, 2013

Official Birth Announcement

Better late than never, right?

It only took 8 weeks for us to get our ducks in a row and get some official announcements out in the mail to family and friends.

Truth is...there were just so darn many choices out there (and they can be a bit pricey!).  Oh, that and the fact that I had exactly 118 really cute, newborn photos to choose from!  (Gosh, he's gonna hate his shutter-bug Grandma.)

We are really enjoying our new little man.  He is changing daily and putting on some weight in a hurry.  Truth is...he doesn't look a day over 11 weeks!
Front
 
back
 
He's so darn sweet.  'Specially when he's sleeping...
 

Wednesday, August 21, 2013

Nursery Decor

I thought I'd share some of Gavin's "Grandma-made" nursery décor.  'Cause for sure, he needs his name as the above-the-crib-nursery centerpiece.  As a reminder, his nursery/bedding is a jungle-theme.  (You might also remember seeing these same letter as shower décor doing double-duty.)

I'm not gonna lie, these took me a few days to finish.  I bought unfinished, light-weight letters, because after all, they do hang above the crib.  This project would have been so much easier & faster if I had splurged on white wooden letters, but where would the fun be in that?  I decoupaged them and WOW! did they turn out great.


How To Make Them:
  • Paint the edges of the letters any color you like.  I spray-painted mine white.  I also painted the backs for a more finished look. 
  • Place letter backwards on back side of paper and trace outline.
  • Cut letter shape out of paper.
  • Apply thin coat of Mod Podge to letter and align paper letter on top, smoothing down. Let dry.
  • If there is excess paper hanging off the edges of letter, either trim with scalpel (or scissors) or you can smooth edges down with a fine grit sandpaper.
  • Apply at least two thin coats of Mod Podge, allowing each one to dry completely before applying the next. Make sure to seal the edges. I brushed the coats in two opposite directions to get a "cross-hatched" finish.
  • Hot glue animal accents.
  • Add decorative ribbon for hanging.  Tie bow/knot at top.
What You Need:
  • Craft Paper Letters (I got mine @ JoAnn's)
  • Patterned Paper (I downloaded 5 digital animal paper(s) and printed on the colored printer 11" x 17")
  • Mod Podge
  • Tools:  Scalpel, Scissors, Pencil, stapler
  • Foam Brush
  • Animal décor (also from JoAnn's)
  • Glue gun
  • Gross grain ribbon

One more last look:
My dear daughter, April, and I had such a fun time with the nursery décor.  I give it about 7 months.  Then it will become a disaster zone.